
Yarn Wrapped Star Ornament {DIY Tutorial}
Homemade ornaments are fun, personal and the sky is the limit for your creative juices. This year I opened up an Etsy store called House 129 and have made several ornaments that are rustic, natural, and a bit of whimsy. The Yarn Wrapped Star Ornament is one of those pieces and was inspired by West Elms Yarn-Wrapped Ornament. Today, I'm tickled silly to share the DIY tutorial for this ornament.
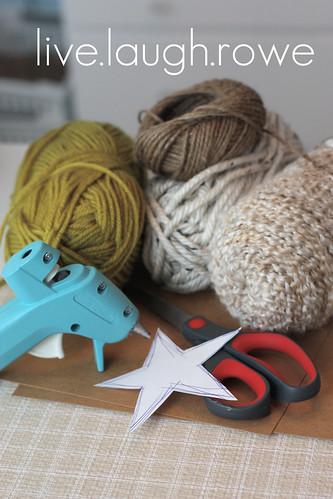
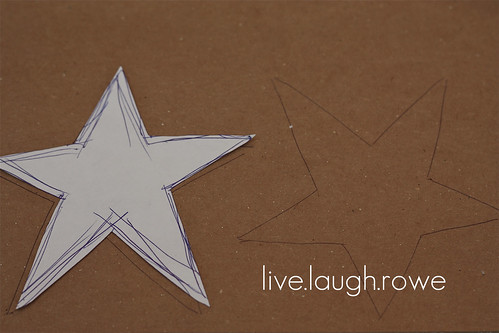
Supplies you'll need include a piece of cardboard, glue gun, scissors, yarn(s) of choice, twine and a star template (the size and shape of your choice personalizes this tutorial). The very first thing you'll want to do is decide on the shape and size of your star. Trace it onto the cardboard and cut. Note: My cardboard is white on one side and kraft on the other (as you will see throughout the images).
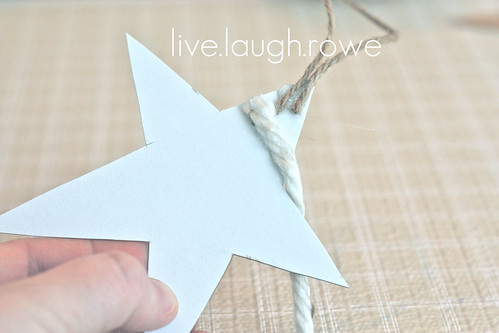
Once you have your star(s) cut out, you'll want to cut a piece of twin to use for your loop. I usually do a 7"-8" strand for my ornaments, but that can vary based on personal preferences. Make sure your glue gun is warmed up and ready to go to work, here is where the fun gets started. Now you'll want to place a small amount of glue on the tip of the star and ensure that each end of your twine is secure. You'll also want to put a dot of glue to place the yarn on before you start wrapping.
And now you wrap... there is no mathematical, order or system to this.
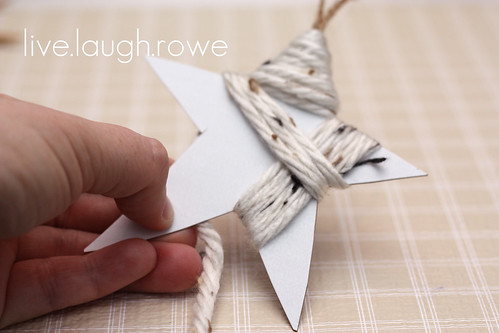
Just keep wrapping, going in different directions. This is thee element of this ornament that makes each and everyone unique, with a rustic feel. No perfection is necessary here {yay!}. For the perfectionist in me, that's like a breath of fresh air {smile}. Now, when you get to the points, you'll want to be sure to use your glue gun -- placing glue on both side to ensure that the yarn cannot unravel.
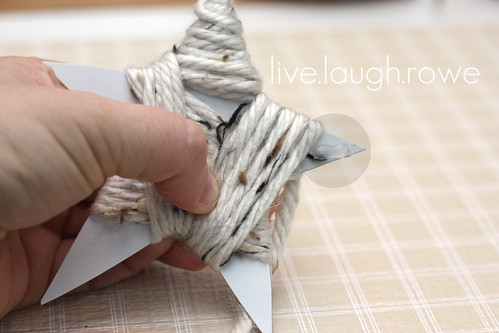
It's a little hard to see, but it is picture above in the spotlighted section. So, how is your wrapping coming along? Just keep wrapping...until the entire piece of cardboard is covered and it appears that that the star is balanced overall. While a perfect wrap isn't necessary, you don't want one side of the star much thicker than the other. As your wrapping, you can evaluate and adjust as necessary. However, once you glue a point, turning back is a little harder to do. As you near completion, wrap until you have the perfect spot to cut the yarn and inner twine it within the ornament. When that is determined, be sure to apply a dot of glue again to ensure it's secure.
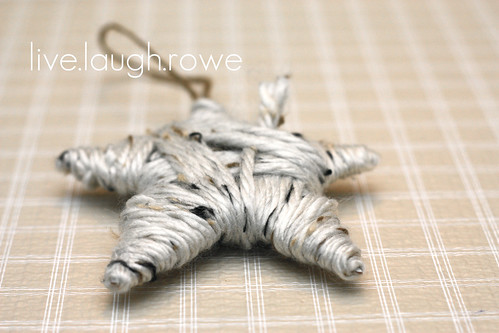
Once you've completed that step -- VOILA! You have yourself a Yarn Wrapped Star Ornament. I love this yarn too. The color is called Aspen Tweed. I picked it up at Walmart and I'm in love with it's color and texture. Their not difficult and can be made in all different shapes, sizes and color. Add one to your gifts for a little extra touch of love. Happy Crafting!

No comments:
Post a Comment